How To Set Up Your EasyDesk Workspace Without Sample Data
Noah Parker
21 May, 2026
EasyDesk gives you the option to start with a clean workspace instead of using sample or demo data. This setup method works best if you want to configure everything manually and build your support system from scratch.
This guide walks you through the essential setup process after choosing Set up later during onboarding.
Skip Sample Or Manual Data Setup
After signing up, EasyDesk shows a welcome screen with setup options.
Click Set up later to continue with an empty workspace.

After that, you’ll enter the EasyDesk dashboard without demo tickets, conversations, or agents.
Invite Your Team Members
Go to:
Settings
Users & Roles
Users
Click Invite user.

Enter:
User email address
Role permissions
Workspace access permissions
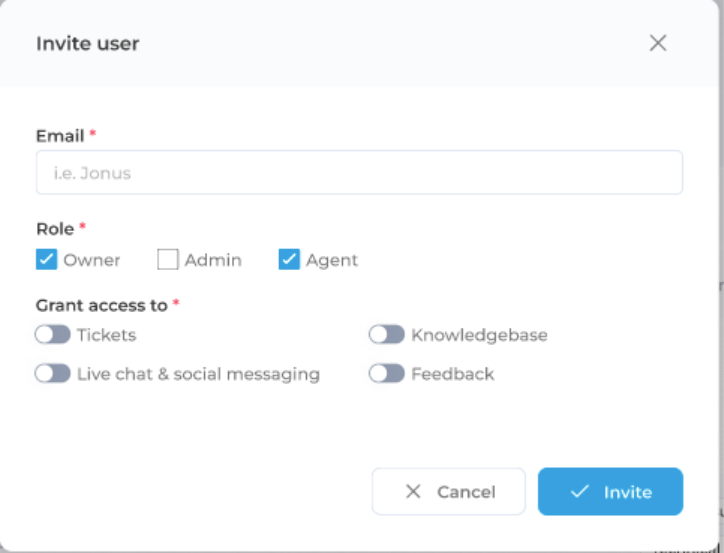
Then click Invite.
Note: If you invite someone as an Owner or Admin, also make sure to:
Enable Agent access
Assign them to support groups
Without proper agent and group permissions, users cannot reply to ticket conversations.
Configure Support Groups
Go to:
Settings
Users & Roles
Groups

Inside groups, you can:
Create groups
Assign agents
Configure permissions
Set default groups
Open any group and click Add agent to assign team members.
Add Agents To Groups
Choose the agent, configure permissions, then click Add.

Configure Support Channels
Go to:
Settings
Channels
Click on the default channel

Channels allow customers to contact your team through multiple communication methods.
Inside channel settings, you can configure:
Ticket email support
Live chat
Social channels
SMS support
Set Up Ticket Email Support
Open the Ticket tab inside Channels.
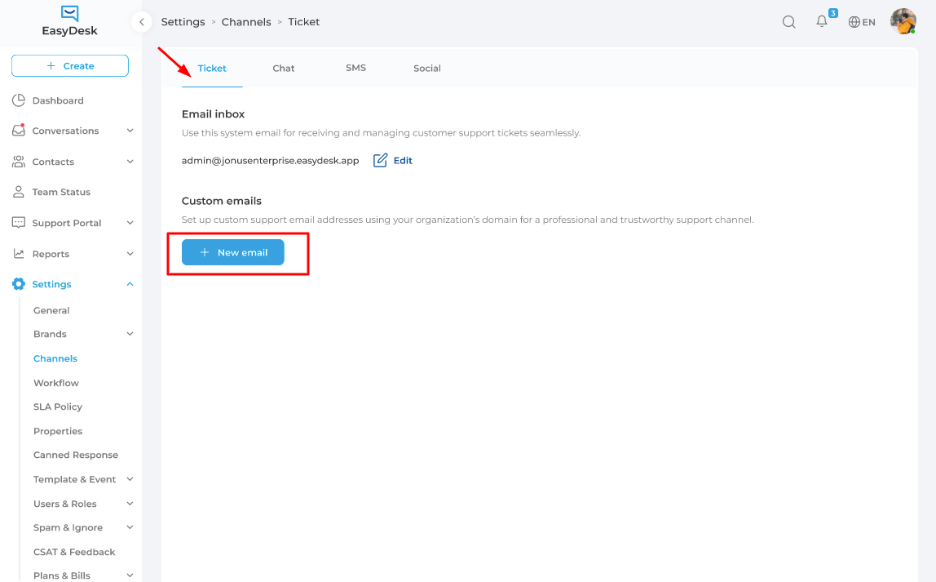
Here you can:
Use the generated EasyDesk email address
Add your own custom support email
Configure forwarding and domain verification
Click New email to connect your support address.
Configure Live Chat
Open the Chat tab inside Channels.
Enable Live Chat Support to activate the website chat widget.

Configure Chat Widget Settings
From here, you can configure:
Chat availability
Widget behavior
Customer messaging experience
Customize Brand Settings
Go to:
Settings
Brands
Customization

Inside customization settings, you can configure:
Business hours and holidays for your live chat availability
Click Edit to update your brand details.
Follow Best Practices
Create groups before inviting large teams
Assign agents to proper support groups
Configure business hours early
Use branded support email addresses
Avoid Common Mistakes
Avoid inviting admins without agent permissions
Avoid leaving groups without assigned agents
Avoid enabling live chat before configuration
Avoid using personal emails for support handling
Need Help?
If you need help configuring your EasyDesk workspace, contact the EasyDesk Success Team for assistance.
Was this information helpful?