Related Articles
No related articles found!
How To Create Your First Ticket In EasyDesk
Noah Parker
20 May, 2026
EasyDesk automatically creates a default support channel after your workspace setup is complete. You can immediately start receiving customer emails as support tickets without any additional configuration.
This guide will help you:
Access your default support channel
Send your first support email
Receive the email as a ticket
Assign and manage the conversation
Reply to the customer from EasyDesk
Open Your Default Support Channel
After logging in to EasyDesk:
Go to Settings
Click Channels

Open the default support channel
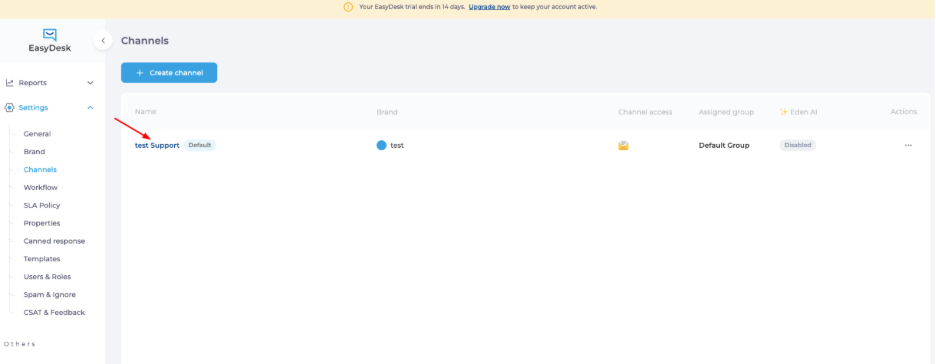
Your default channel appears automatically during workspace creation.
Find Your Generated Support Email
Inside the channel settings:
Open the Ticket tab
Locate the generated support email address

The address will look similar to:
yourcompany_support@yourworkspace.easydesk.app
EasyDesk automatically uses this email address to receive incoming support requests.
You can start receiving tickets immediately using this email.
Send A Test Email
Open your regular email account and send a test email to the generated EasyDesk support email address.
Example:
Subject: Ticket Creation Check
Message: Testing if the ticket creation, replying to tickets etc. is working in EasyDesk
After sending the email, EasyDesk automatically converts the message into a ticket.
Check Your Ticket Inside Inbox
To view the incoming ticket:
Open Conversations
Click Inbox
Locate the newly created conversation

EasyDesk automatically creates a ticket from the incoming email and places it inside your inbox queue.
Open The Conversation
Click the conversation to open the ticket details.
Inside the conversation view, you can:
Read the customer message
View ticket details
Check conversation status and priority
Manage the support workflow
Assign The Ticket To Yourself
If you want to reply, you need to assign the conversation to yourself.
Open the ticket
Click Assign to me

EasyDesk will automatically mark you as the assigned agent for that conversation.
The activity timeline will also show the assignment event for tracking purposes.
Reply To The Customer
After assigning the ticket:
Click Reply

Type your response
Send the message
You can add an internal note as well. Internal notes stay private and are not visible to customers.
EasyDesk delivers the reply directly to the customer through email.
Congratulations! You have successfully made your first ticket.
Next Steps
Once you’ve verified ticket flow, you can:
Add your own support email address
Invite team members
Configure groups and permissions
Set up live chat and support portal
Need Help?
If you need help configuring your workspace, contact the EasyDesk Team.
Best Practices
Use clear email subjects for test tickets
Use internal notes for team communication
Reply from EasyDesk instead of personal inbox
Keep conversations organized with tags and groups
Common Mistakes
Avoid sending emails to the wrong support address.
If you invite a user as an Admin or Owner, make sure they also have agent access and group-level permissions enabled. Otherwise, they will not be able to reply to ticket conversations.
Avoid leaving tickets unassigned
Check spam or promotions folders if emails do not appear quickly
Was this information helpful?