Feedback Settings In EasyDesk
Ava Adaline
09 February, 2026
This guide explains how to configure feedback settings in EasyDesk to control how feedback, roadmap, and changelog appear to users. It helps you manage visibility, structure feedback with boards and statuses, and track progress clearly across your public portal.
Access Feedback Settings
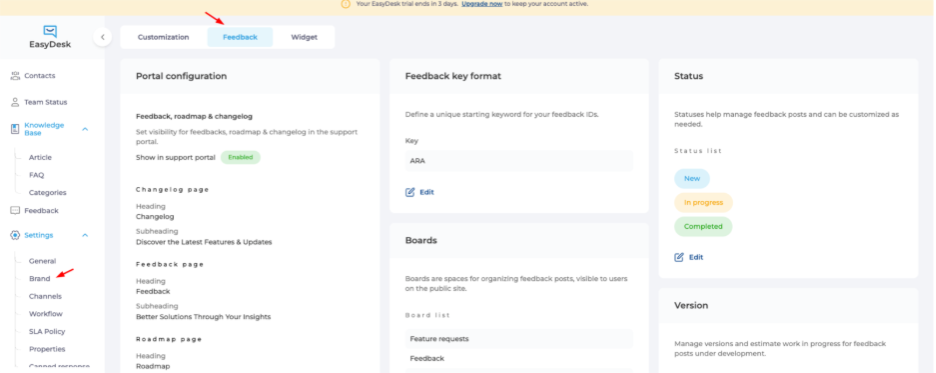
Use this section to open feedback settings from the brand area.
1. Go to Settings from the left sidebar.
2. Click Brand.
3. Select the Feedback tab at the top.
Portal Configuration
Control what users see on the support portal.
This area manages feedback, roadmap, and changelog visibility.

1. Find Portal configuration.
2. Enable or disable Show in support portal.
3. Update headings and subheadings for:
Changelog page
Feedback page
Roadmap page
4. Click Save to apply for changes.
Feedback Key Format

Set a unique ID prefix for feedback posts.
This helps identify feedback items easily.
1. Go to Feedback key format.
2. Click Edit.
3. Enter a short key like ARA.
4. Save your changes.
Status Settings
Define progress stages for feedback posts. Statuses help users track updates clearly.

1. Open the Status section.
2. Click Edit.
3. Review default statuses:
New
In progress
Completed
4. Update names or orders if needed.
5. Save changes.
Boards Management
Organize feedback into clear categories. Boards group similar feedback together.
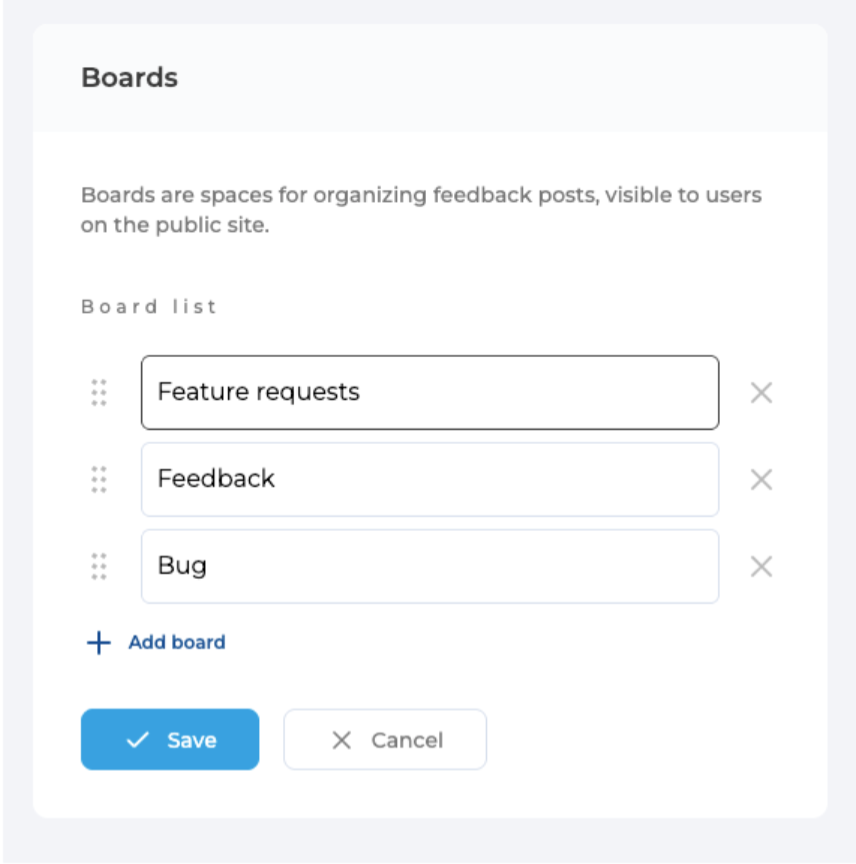
1. Scroll to Boards.
2. Click Edit.
3. Add or rename boards like:
Feature requests
Feedback
Bug
4. Reorder boards if needed.
5. Click Save.
Version Management
Track feedback by product versions. Versions help communicate release progress.

1. Go to the Version section.
2. Click Add version.
3. Enter a version name.
4. Save to apply.
Feedback settings help you collect, organize, and communicate customer ideas in a clear and structured way. Proper configuration ensures feedback, roadmap updates, and changelogs remain transparent, actionable, and aligned with customer expectations across your EasyDesk portal.
Was this information helpful?