How To Automate Workflow In EasyDesk
Noah Parker
06 May, 2026
Workflow automation in EasyDesk helps you handle repetitive support tasks without manual effort. Instead of updating tickets one by one, you can create smart rules that automatically take action when something happens.
Think of it like setting instructions once, and letting EasyDesk handle the rest in the background.
What Workflow Automation Means
A workflow has three main parts:
Event → When something happens
Condition → If certain criteria match
Action → What EasyDesk should do
For example: When a new message arrives (event), if the subject contains “urgent” (condition), then set priority to high (action).
Why Use Workflow Automation
Workflow automation helps you:
Save time on repetitive tasks
Keep responses consistent
Reduce manual errors
Ensure important tickets get attention faster
Automatically organize conversations
Once set up, workflows run continuously without any extra effort.
Open Workflow Settings
To start using workflows:
Go to Settings from the left sidebar
Click on Workflow
You will see a list of all existing workflows

Each workflow shows:
Name of the rule
What it does
Status (Enabled or Disabled)
Last updated time
You can manage everything from this screen.
Create A New Workflow
Follow these steps to create your own automation:
Click New workflow

A new dashboard will appear to enter the details for your new wokflow settings

Choose The Right Rule Name And Event
Enter a proper rule name for your and your team’s understand.
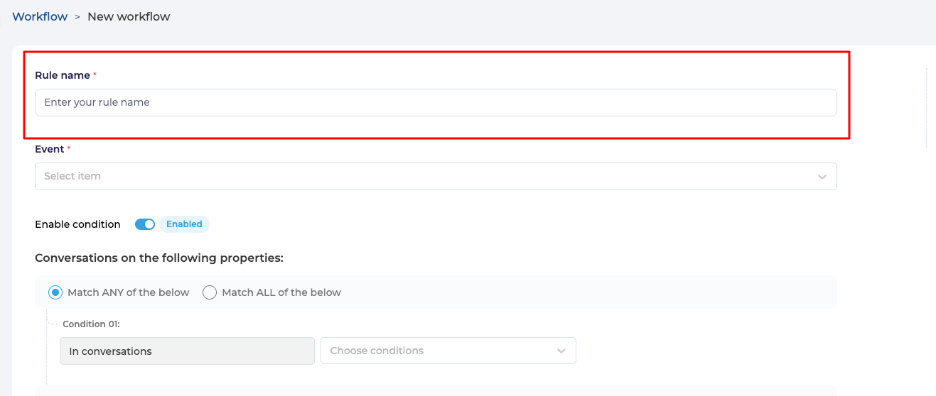
Next, the Event. The event decides when your workflow should run. It is the starting point.

You can choose from events like:
Agent added to a group
Group manager access given
Mentioned in note
New note added
New conversation response
New user joined
Note updated
Owner access given
Conversation Created
Conversation Deleted
Conversation Updated
Time Triggered
Unrecognized customer response
Mentioned in feedback activity
New conversation reply
Conversation merged
Example: If you want automation when a new reply comes in, choose New conversation response.
Turn On Conditions For Better Control
Conditions help you control when a workflow should run.

Turn Enable condition ON to apply filters
Keep it OFF if you want the workflow to run every time the event happens
Use conditions when you want more precise automation.
Add Conditions Step By Step
Conditions define the logic behind your workflow.
Step 1: Choose Match Type

Match ANY → Workflow runs if any condition is true
Match ALL → Workflow runs only if all conditions are true
Fill-up the value for what will be the condition and it should match or not. Then your first condition will be finished.

Step 2: Add A New Condition
Click add new condition

Select a field (like Subject, Email, Priority)
Choose how it should match (is, contains, etc.)
Enter the value

Example
Subject contains “refund”
Requester email is support@company.com
You can add as many conditions as needed.
Use Filters For Advanced Logic
If your workflow needs more complex logic, you can group conditions.
Click add new filter
Choose OR or AND

How It Works
OR → Either group can match
AND → All groups must match
Example:
Subject contains “urgent” OR “priority”
Email is VIP AND priority is high
This helps you create powerful and flexible rules.
Set Actions Clearly
Actions define what EasyDesk should do when the workflow runs.
Add An Action
Go to Perform actions
Click Select item

Choose an action
Select or enter a value
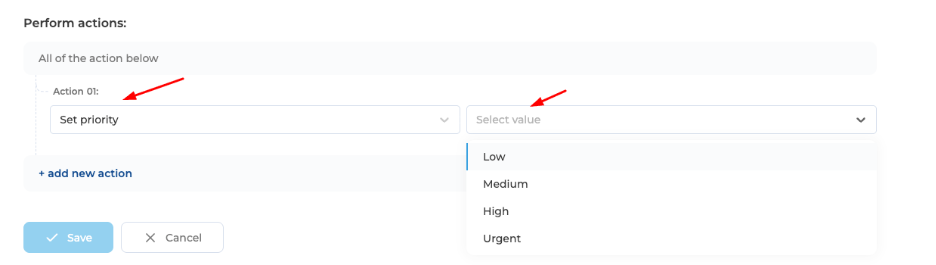
Common Actions
Set priority (Low, Medium, High, Urgent)
Add tags
Assign tickets
Send notifications
Example
Set priority → Urgent
Add tag → Important
You can add multiple actions in one workflow.
Save And Activate
Once everything is set:
Click Save

Your workflow becomes active immediately (if enabled)
You can always come back and edit it later.
Manage Existing Workflows
From the workflow list page, you can:
Turn workflows ON or OFF
Edit rules anytime
Reorder workflows based on priority
Check when they were last updated

Keeping workflows organized makes management easier as your system grows.
Simple Example To Understand
Let’s create a basic workflow:
Event: New conversation response
Condition: Subject contains “urgent”
Action: Set priority to Urgent
Result: Every time a message includes “urgent”, EasyDesk automatically marks it as high priority.
Best Practices For Better Results
Use clear and meaningful rule names
Start with simple workflows, then improve gradually
Avoid creating too many overlapping rules
Test your workflows before relying on them
Review workflows regularly to keep them effective
Final Thought
Workflow automation in EasyDesk helps you stay efficient without extra effort. Once your rules are set, your support system becomes faster, smarter, and more organized.
Was this information helpful?